
Make Your Own Outdoor Play House Using Materials from Musgroves
1. Choosing the Perfect Location
Selecting the right location for your outdoor cubby house is crucial for safety, durability, and enjoyment. Consider the following factors:
- Ground Level and Drainage: Choose a site with level ground or minimal slope. Avoid areas prone to pooling water, as excess moisture can lead to wood rot and instability.
- Sun and Shade Balance: Position the cubby house where it receives a mix of sunlight and shade. Too much direct sunlight can make it too hot, while excessive shade may encourage dampness.
- Safety and Accessibility: Ensure the area is free from hazards such as tree roots, overhanging branches, or sharp objects. The location should also allow easy access for children and maintenance.
- Space for Play: Leave enough room around the cubby for outdoor play activities, ensuring a safe buffer zone.
- Proximity to the Home: If supervision is necessary, position the cubby house where it is easily visible from the home.
2. Building a Sturdy Foundation
A solid foundation is essential for the cubby house’s stability. Follow these steps to set up a square and secure post foundation:
Marking the Layout
- Determine the dimensions of your cubby house floor.
- Using a string line and stakes, mark out a rectangle on the ground to define the perimeter of the foundation. Ensure precise right angles by measuring diagonally from corner to corner—both diagonals should be equal.
- Adjust the string lines as needed to ensure the layout is perfectly square.

Digging the Post Holes
- Dig post holes at each corner of the rectangle to a minimum depth of 600mm.
- If your cubby house includes a verandah, dig two additional post holes at the front where the verandah joins the main structure.
- If building on uneven ground, ensure posts are left with extra height above ground level to allow for later adjustments.
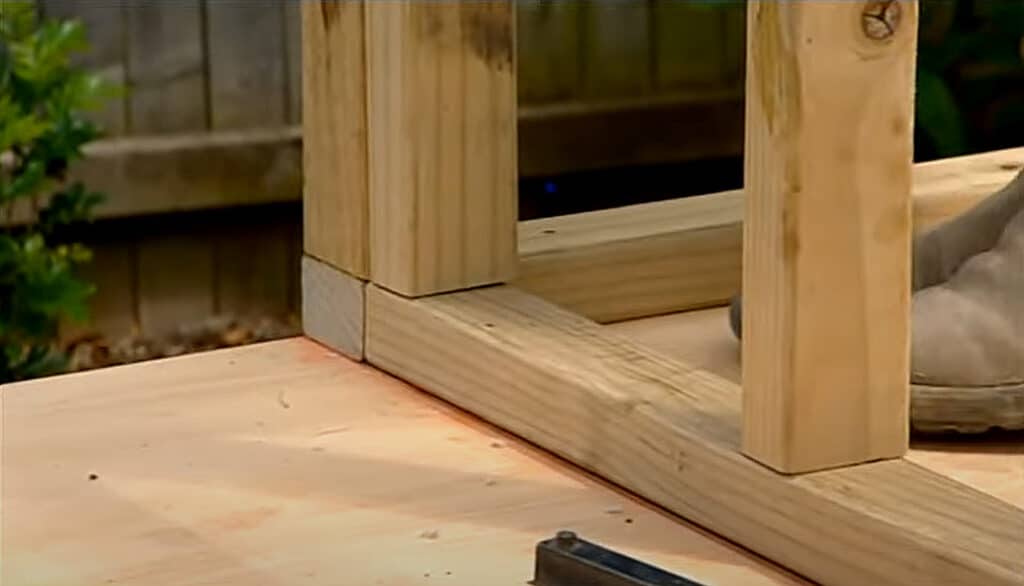
Installing the Posts
- Use H4 treated pine posts, which are ideal for in-ground use and provide resistance to decay and insect damage.
- Place each post into its hole and use a spirit level to ensure it is perfectly plumb (sitting perfectly vertical).
- Secure posts in place using rapid-set concrete. Fill the hole around each post, re-checking for plumb as it sets, in case it was bumped out of alignment during pouring.
- Allow the concrete to cure fully before proceeding.
Final Adjustments
Double check that the foundation is level before installing the cubby house frame.
3. The Importance of a Good Solid Floor
A well-constructed floor is essential for any outdoor playhouse or cubby house. It provides stability, ensures longevity, and enhances safety. Whether you are building a small backyard cubby or a larger play structure, following the right techniques will help create a durable and level base.
Choosing the Right Materials
The floor framework should be built using strong, treated timber to withstand outdoor conditions. H4 treated pine posts are highly recommended for ground contact, as they offer excellent resistance to moisture and insect damage. Additionally, all cut timber ends should be sealed with a proprietary treatment, such as ‘RotStop,’ to prevent decay and extend the lifespan of the structure.
Constructing the Floor Frame
The foundation posts should be installed securely and trimmed to the correct height before beginning the floor construction. Once the posts are ready, the next step is attaching the bearers—these are the horizontal beams that will support the floor frame. The bearers should be fixed to the outside of the posts using bugle baton screws, forming a solid perimeter frame. Ensuring the bearers are level is crucial to avoid an uneven floor.
For additional structural support, internal cross members should be installed within the frame. These beams, typically 150 x 50mm, should be securely nailed to the bearers to provide extra strength.

Once the concrete has set and the bearer frame has been secured, the tops of the posts can be trimmed using a saw, to accommodate the plywood sheets. For optimal durability, consider sealing the cut ends of your H4 treated pine posts to maintain their protective treatment.
Installing the Flooring
Once the frame is complete, the flooring material can be laid. Standard plywood sheets (e.g., 7mm CD Plywood H3 KD NEW) measure 2400mm x 1200mm, meaning that unless the width or depth of the playhouse is 1200mm or less (which is unlikely), two sheets will generally be required. One sheet should be positioned flush with the corners of the frame, while the second sheet will need to be trimmed to fit the remaining space. To maintain structural integrity, the inside edge of each sheet should be supported by a noggin to prevent sagging or movement over time.
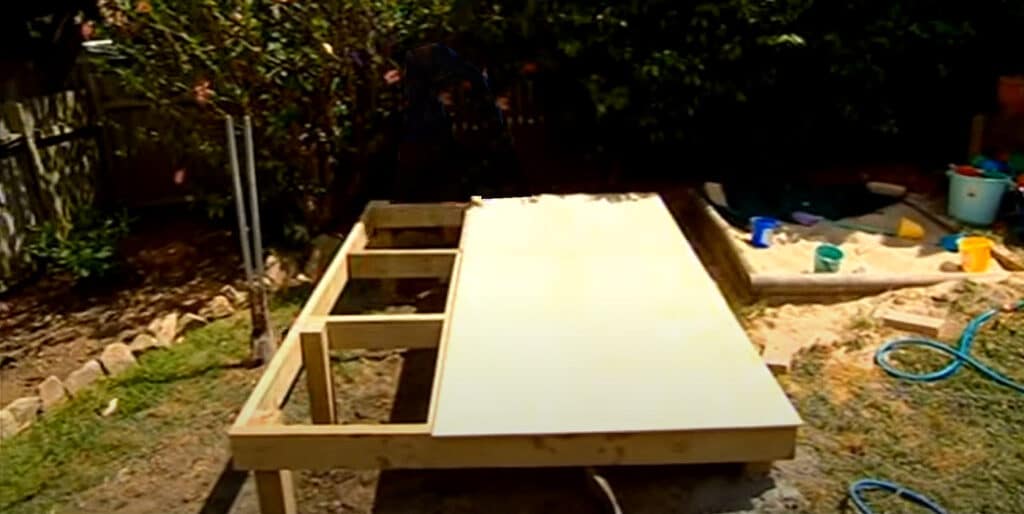
With the flooring securely in place, the playhouse now has a strong and stable base, ready for the next stages of construction. By following these best practices, you can create a floor that will provide years of safe and reliable use.
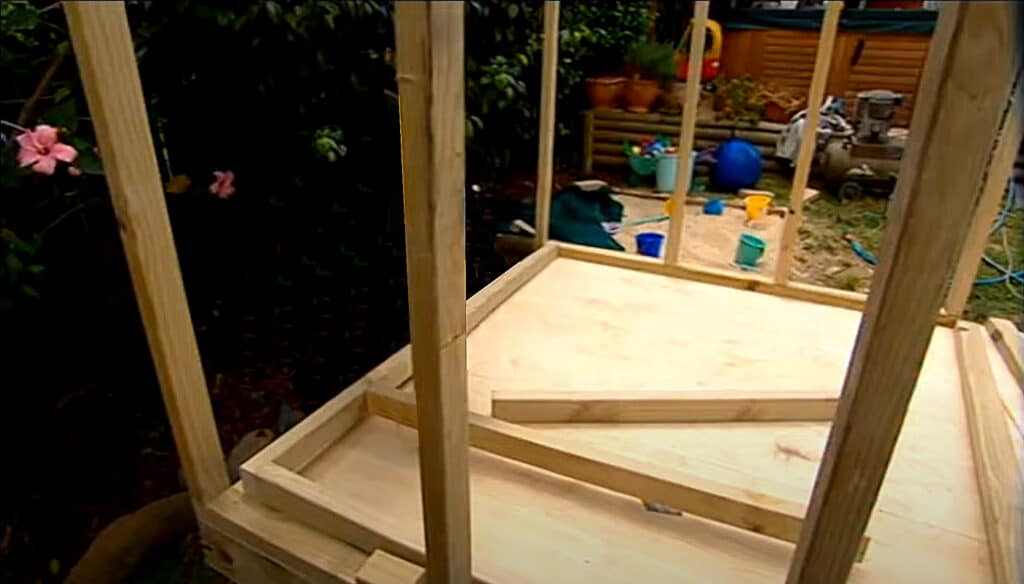
4. Constructing the Walls
When building the walls of a cubby house, using a solid timber frame provides strength and durability. A good starting point is to use 70 x 45mm timber for the framing (you don’t need the regular framing size of 100×50 (90×45) which would be overkill for a kid’s playhouse). It’s often easiest to assemble the frames on a flat surface before standing them up and securing them in place.
For side walls, consider spacing the studs approximately 500mm apart. This spacing allows for window openings, which can be added later. Keeping the wall height aligned with standard sheet sizes reduces the need for excess cutting and material waste. When measuring and cutting studs, account for the width of the top and bottom plates to ensure a precise fit.
Once the side walls are built, stand them in place and secure them through the floor and at the corners. Adding noggins (horizontal bracing between studs) is optional but can help strengthen the frame. If incorporating windows, install a sill plate between the center studs at a height that suits the intended window design (check out our clear 4mm perspex, the perfect safe solution for playhouse windows).
For front and back walls, adjust stud placement to accommodate a door and any additional windows. Typically, a wider spacing is left for a door opening, with remaining studs positioned to maintain structural integrity. When all walls are positioned, ensure they are plumb before fastening them securely. Attaching plywood sheets to the exterior of the frames helps with stability and weatherproofing. Lowering the sheets slightly over the base ensures a clean finish while leaving space at the top for roof gable panels if needed.
5. Choosing a Roof Design
The roof style significantly impacts the cubby house’s appearance and functionality. A pitched roof offers a traditional look but requires precise cutting and angled joins. A simpler alternative is a skillion roof, which slopes in one direction, providing effective water runoff and easier construction.
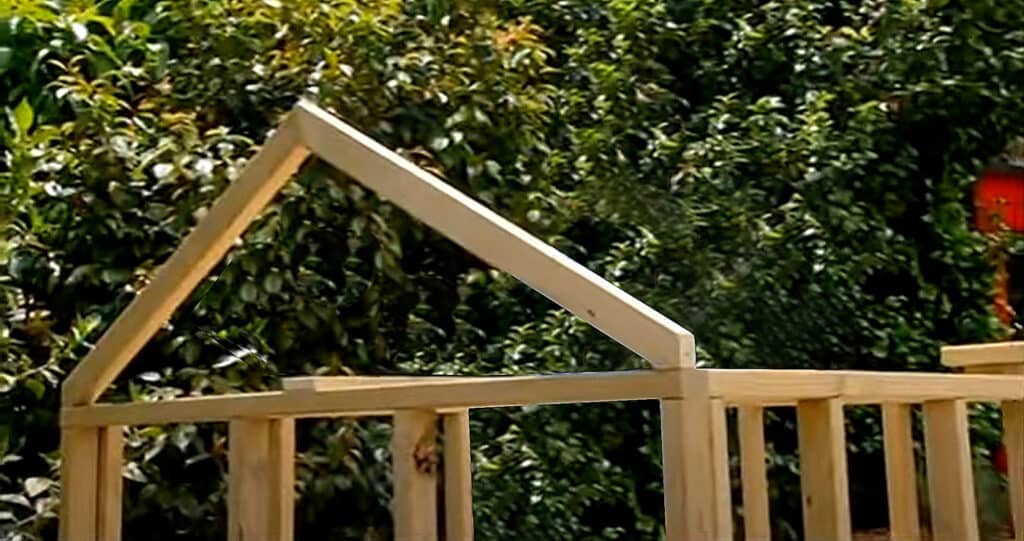
For a skillion roof, install an additional top plate along the back wall to create a height difference between the front and back. Using 70 x 45mm timber, position roof rafters at even intervals—around 450mm to 500mm apart—for reliable support. These rafters should run from the back wall to the front, slightly overhanging the verandah area if one is included. Allowing an overhang at the front also provides additional rain protection and a more finished look.
When securing the rafters, ensure they sit flush on the top plates and are fastened securely. Once the framework is in place, the roofing material—whether plywood, corrugated iron, or polycarbonate—can be installed. Properly sealing the roof helps protect the cubby house from the elements, ensuring longevity.
Corrugated iron is an excellent choice for children’s outdoor playhouse roofs and verandas due to its durability, weather resistance, and ability to provide reliable shelter from sun and rain. Its lightweight design makes installation easy, while its classic look adds a charming, rustic appeal to any play space.
By carefully planning wall placement and choosing an appropriate roof style, a cubby house can be both sturdy and visually appealing. Prioritizing precise measurements, secure fastening, and weatherproofing will result in a long-lasting structure that provides a safe and enjoyable play space.
