Are you looking to breathe new life into your outdoor space without breaking the bank? Look no further than DIY paver projects! Whether you’re dreaming of a cozy patio for summer barbecues, a charming garden path, or simply want to add some structure to your flower beds, pavers offer a versatile and affordable solution. In this guide, we’ll walk you through everything you need to know to tackle your own paver project, even if you’re a complete novice.
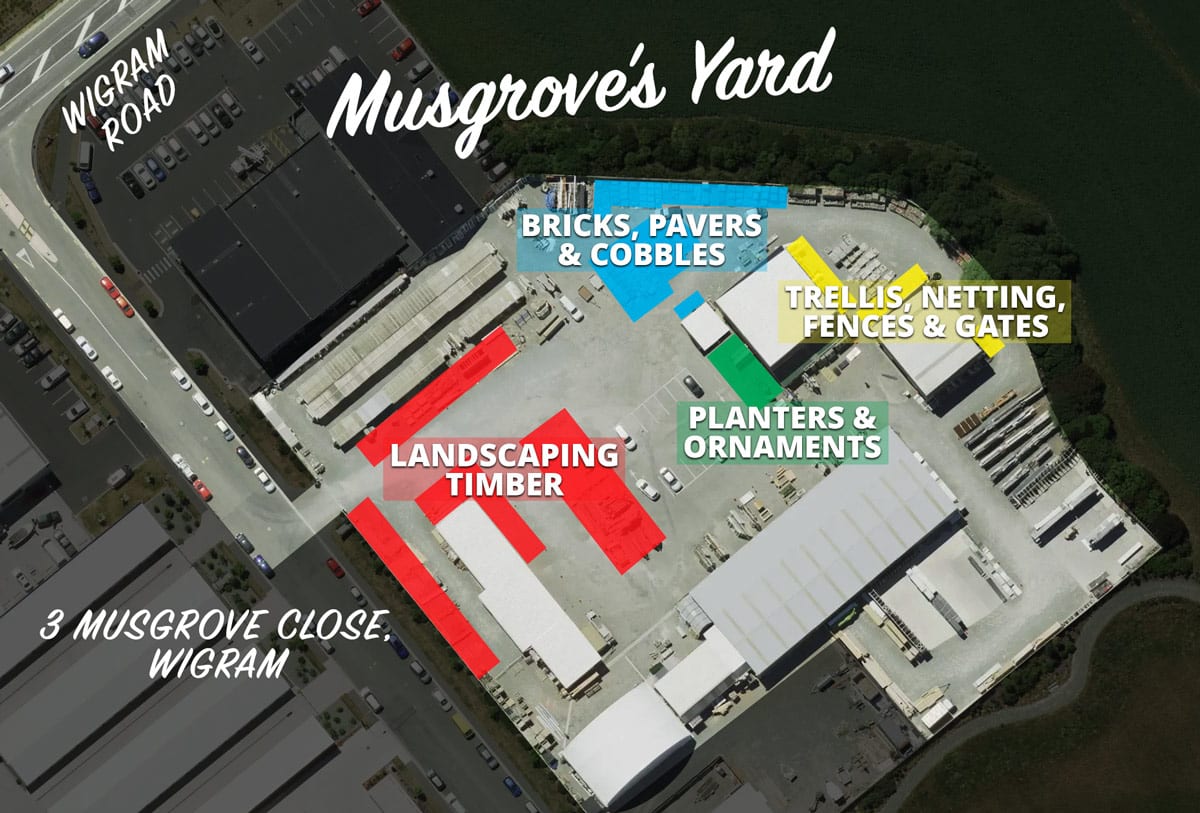
Before embarking on your paver project a visit to our yard is a must – we always have good stocks of quality paver seconds, in range of different styles and size.
Why Choose Pavers?
Pavers are an excellent choice for landscaping projects due to their durability, versatility, and ease of installation. They come in a wide variety of colours, shapes, and sizes, allowing you to create unique designs that complement your home’s exterior. Plus, by doing it yourself, you’ll save on labour costs and gain the satisfaction of creating something with your own hands.
Popular types of DIY Paver Projects
Patios
A paver patio can transform a bland backyard into an inviting outdoor living space. It’s perfect for placing outdoor furniture, grills, or fire pits, creating an ideal area for relaxation and entertainment.
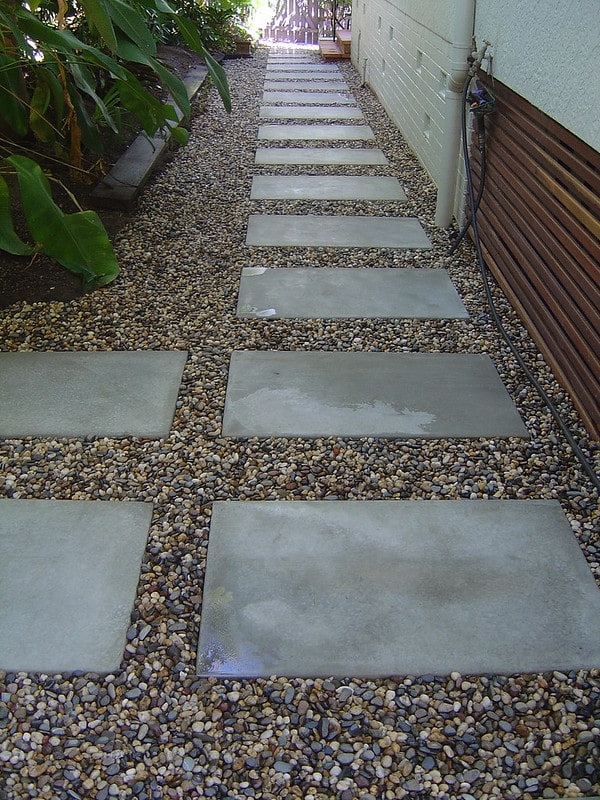
Walkways
Paver walkways not only improve the functionality of your outdoor space by providing clear paths but also add visual interest to your landscape. They can guide visitors through your garden or create a welcoming entrance to your home.
Borders
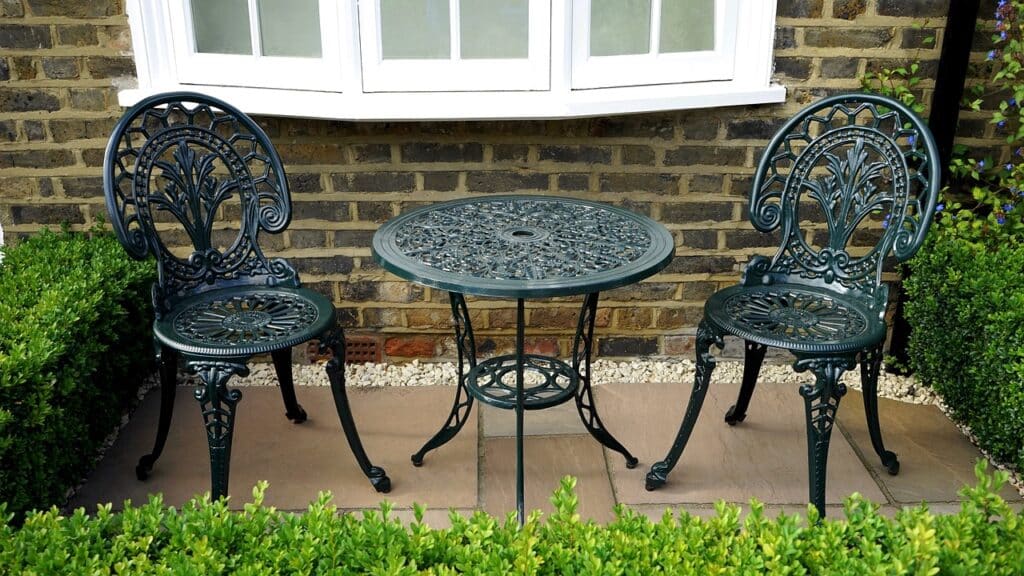
Using pavers as borders for flower beds or garden areas is a simple yet effective way to define spaces and add a polished look to your landscaping. This project is particularly suitable for beginners due to its straightforward nature.

Preparation Steps
Planning Your Design
Before you start, sketch out your ideas. Consider the shape, size, and purpose of your project. Think about color schemes and patterns that will complement your home’s exterior. Don’t forget to factor in drainage to prevent water pooling.
Gathering Materials
You’ll need:
- Pavers
- Gravel for the base
- Sand
- Edging material
- Landscape fabric
- Plate compactor (can be rented)
- Shovel
- Level
- String and stakes for outlining
Step-by-Step Installation Guide
1. Site Preparation
Start by clearing the area of grass, rocks, and debris. Outline your project area using string and stakes. Excavate the area to a depth of about 6 inches plus the thickness of your pavers.
2. Base Layer
A solid base is crucial for a long-lasting paver installation:
- Lay landscape fabric to prevent weed growth.
- Add a 4-inch layer of gravel.
- Compact the gravel using a plate compactor.
- Add a 1-inch layer of sand and level it.
3. Laying Pavers
Now for the fun part – laying your pavers:
- Start at a corner or edge, placing pavers in your chosen pattern.
- Use a level to ensure each paver is even with its neighbors.
- Cut pavers as needed to fit around edges or obstacles.
- Once all pavers are in place, add edging material around the perimeter to prevent shifting.
- Spread a layer of sand over the pavers and sweep it into the gaps.
- Use the plate compactor again to settle the pavers into place.
Common Mistakes to Avoid
- Don’t use dirt as a base – it will settle unevenly and cause your pavers to shift.
- Take your time with leveling – a rushed job will be noticeable and can create tripping hazards.
- Avoid laying pavers directly against your house foundation without proper drainage considerations.
Maintenance Tips
To keep your paver project looking great for years to come:
- Regularly sweep or blow off debris.
- Occasionally rinse with a garden hose to remove dirt.
- Re-sand joints every few years as needed.
- Address any shifting or settling promptly to prevent further issues.
Final thoughts
Creating your own paver project is a rewarding way to enhance your outdoor living space. With proper planning and execution, you can achieve professional-looking results that will last for years.
Don’t be afraid to start small – even a simple border or short walkway can make a big impact. As you gain confidence, you can tackle larger projects and continue to transform your outdoor area into the oasis you’ve always wanted.
Remember, the key to success is in the preparation and taking your time with each step. Before you know it, you’ll be enjoying your beautiful new outdoor space, with the added pride of knowing you did it yourself. Happy paving!
Selected paver listings
See our full range at the Musgroves yard, map below.
-
") 190x230x40mm Recycled Pavers/Cobbles$0.95 Each
190x230x40mm Recycled Pavers/Cobbles$0.95 Each -
Product on saleSand Dune 400x200x50mm Seconds PaversOriginal price was: $5.50.$3.50Current price is: $3.50. Each
-
Porcelain Paving Stone Off Cut (all different sizes)$2.00 Each
-
Coloured Textured Paver SECONDS 500x500mm$20.70 Each
-
Natural Exposed Aggregate Paver SECONDS 500x500mm$28.00 Each
-
Yorkstone Paver – Second$17.40 Each
-
Shotover Aggregate Seconds Paver 900x450mm$43.50 Each
-
Paver 500x500mm New Textured Coloured$22.10 Each
-
200 x 100mm Cobble – All Colours$0.95 Each
")
")


Where to find our pavers