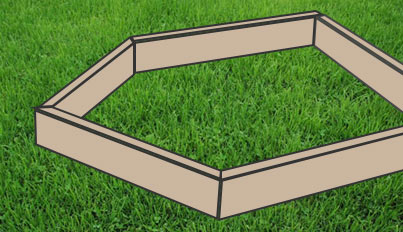
Anyone familiar with our Macrocarpa planters doesn’t need a vivid imagination to quickly see that our macrocarpa timber would also be perfect for making sandpits. Most of the construction principles and even location-choosing logic is exactly the same, but using sand rather than soil. Visit our curated Pinterest board for awesome visuals to get inspired and see our handy sandpit-building tips below:
Choosing the best sandpit location
Try to find a spot that has roughly a 50/50 split between being in the shade and in direct sunlight. If you put it in a dark corner of the garden with permanent shade, your sand might not dry out properly after rainfall or flooding and become waterlogged. Besides sunlight, good drainage is the other key to preventing permanently damp sand (don’t create a water-tight seal for the containing structure or put the pit in a dip where water pools after heavy rainfall).
If you put the sandpit in an spot that gets full direct sun throughout most of the day, you might find it’s a bit intense for kids through the middle of the day. If you have limited locations to place the sandpit, and don’t really have a choice but to put it in a very sunny spot, there are other options for providing shade.
The other thing to consider with the location is visibility – you’ll want to have a clear line of sight to be able to keep an eye on the kids at play.
Options for Sandpit Shade
To increase the time your kids can spend in the sandpit and make hats and sunscreen top-ups not such a nagging concern, you can place a shade sail above the sandpit, put it adjacent to a playhouse or play wall, or even construct the sandpit around a tree (a convenient alternative to a sail shade).
Another shade option is to build the sandpit into the ground level of, or directly adjacent to, a two-storey fort structure for overhead shade.
Securing/Covering the Sandpit
A good idea for preventing unsupervised play, stopping water and debris from entering, and for stopping your neighbourhood cats from using the sandpit as a giant kitty litter is to have a solid wooden lid or a wooden-framed plastic mesh that can be easily secured and removed with screws or a latch. Our Pinterest Sandpit board shows several clever designs incorporating sliding and hinged wooden lids.
Structure Combinations & Themes
There’s a great opportunity with a sandpit to introduce additional features to really extend the play options (and play time hopefully!). A good idea is an activity wall on one of the sides with sand pouring implements attached, a chalkboard front, or hooks to hang buckets and spades from. Combining functions is always a plus, with one clever design we found having a chalkboard attached to the underside of a wooden hinged lid, that could be drawn on when the sandpit was open for use.
A slide into the sand pit from an adjacent fort is a good way to always have a safe landing, and make the sandpit just a part of a bigger entertainment area. Having a sandpit raised and on wheels (like you’d see mobile planter boxes) is a good way to be able to move it around but a shallow sand pit is best for such designs because of overall weight.
A popular and simple way to do a pirate ship or train design is by making one of the sides triangular like a boat or train front.